How to Remove Bloatware from a PC.
The scene opens: It’s a beautiful October day, and you’ve just come home after a trip to your local big-box retail store, with a bounce in your walk and a smile on your face. Why so ecstatic? You've gone out and bought a new PC! You've pinched your pennies, did your research and found just the right machine for your needs.
Jubilant, you rip piece by piece of packaging off your new toy, assemble all the pieces and power it up, right in the middle of the floor. Windows loads up, and then pops up the first time setup. You make an account, and there you are; contemplating the desktop. You feel a sense of fulfilled ownership: that is your personal recycle bin; that is your personal browser; those are your personal network places. That is your personal Desktop assistant bar; your personal invitation to get 15 free photo prints and your personal assortment of 30 day trials to…

Wait; is that a trial for America Online?

What is all this crap?
When you buy a brand new PC from nearly any manufacturer, they’ve already installed an operating system for you. Out of the kindness of their heart (read as “they were generously reimbursed”) they threw in a few extra “features and services” that they recommend (due to what accounts to corporate bribery). These range from the handy to the mostly harmless to the totally insufferable. In any case, your PC would be better off without them; today we are going to show you a method to get your new computer as running as clean and free as it can be. Then, we’ll show you how to back up your disk so that you can restore your PC to a clean state whenever you want, even if you cannot boot into Windows.
Un-crap your PC
The first step’s an easy one: download and run PC Decrapifier. PC Decrapifier maintains a list of crapware commonly installed on new PCs, and uninstalls them for you all together with minimal input from you.
The decrapification (“decrapify” is one of our favorite words) process is very simple. Just use the internet or a USB thumb drive to get the executable onto the PC, and then give it a run. When you’re asked, indicate that you’re running PC Decrapifier on a new computer.

The program will perform a quick scan, then return a list of programs that it identifies as junk. PC Decrapifier does a really good job of identifying all of the obvious junk, like trial versions of badly written and often costly software, and shortcuts with names like “Get 15 Free Photo Prints.” In it’s normal mode, PC Decrapifier will mark all of these for extermination, so unless you’ve got a yearning for some doubtfully free photo prints, just click the Next button.

Now PC Decrapifier will display a list other programs that it has detected on your system. This includes all the programs that are not necessarily junk, but you may not want on your system anyway. For instance, on our test PC, this list included Picasa, “Play Games” and Google Desktop. We could have left these intact, but because we like starting with a totally clean slate, we decided to go down the list and pick out all the programs that we could identify as being non-vital, and selected them for deletion. You do not have to worry about getting absolutely everything, because in the next step we’ll run a targeted uninstaller to clean up whatever we missed.

These programs do not uninstall as quickly as those on the first batch did, and you’ll find yourself having to manage the uninstall menus for many of them. Still, in a couple of minutes you should be done, and you’ll be ready to move onto the next step.
Create a Recovery Disk Image
The new backup utilities in Windows 7 are actually pretty impressive and creating an image will be possible in all versions. Today we take a look at creating a backup image of your machine without the need for an expensive third party utility like Ghost or True Image.
You just finished installing a fresh copy of Windows 7 on your computer and have it set up to your liking. One of the first things you should do now is create an image of the disc so in the event of a crash you will be able to restore it to its current state. An image is an exact copy of everything on the drive and will restore it back to its current state. It’s probably best to create an image when everything is clean and organized on your system. This will make the image file smaller and allows you to restore the system with a smooth running set up.
Creating an Image in Windows 7
 Click on Start
 ![]() ; go to Getting Started, then select Back up your files.
; go to Getting Started, then select Back up your files.
Next click on the Create a system image link to the left.
Here is where you make another important decision, where to store your backup image. You cannot write the system image to the drive you are trying to protect, so make sure you keep whatever external storage medium you choose safe. You can choose an external drive, burn to multiple DVD’s, or store it on a network location. Once you’ve decided on a location, Look at the amount of space the image may take on the confirmation page. If something does not look right you can still go back from this point and make adjustments.
A progress meter is displayed while the images is created and backed up. In a recent machine we worked on here in the store, a disk of about 15GB in size took just under 20 minutes total backed up to an external drive. Of course, times will vary depending on your particular configuration and what sort of medium you are backing it up to.
Isn't that better?
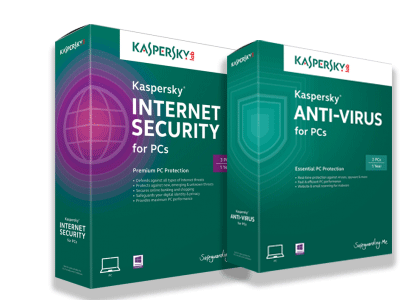
 There. Now your new computer should look more like the image to the right, all pretty and shiny. Now that you have everything removed from your computer, it's time to add a VERY important part, your anti-virus program. You really don't want to have to restore your computer from the image you just mdae too quickly, do you? Keep your eyes on our site for the PC setup guide which will include these tips and more for keping your new PC safe, protected and working like a charm.
As always, if you have any questions, feel free to drop us a line or stop by our downtown Northampton store.